Sunday 3 May 2015

Tomato Flatbread – Lagana Me Domates Ke Votana


Continuing my expedition of the Greek kitchen, I put together another very interesting recipe from Vefa’s Greek encyclopedia – Tomato Flat Bread. I am always very scared of baking bread – I muster courage and cross my fingers hoping all goes well! To ensure good bread you need to ensure you are using good yeast and you give it the right amount of time to rise. This bread is a little dense but full of flavours. I call it a mini Greek pizza! The recipe seems long and time consuming, but the results are worth the wait!

This recipe is a modified version of the one in the book replacing some ingredients based on availability and taste.


Ingredients

Dough
2½ cups all-purpose flour (Maida)
1 tsp salt
2 tsp mixed herbs – oregano, chilli flakes, rosemary, thyme and roasted garlic
1 tsp honey
1 tsp sugar
5 tbsp olive oil
3 tsp active dried yeast (I prefer to use Tesco Dried Yeast)
½ cup luke warm water

Topping
8 garlic cloves crushed
2 table spoon finely chopped olives
2 tbsp tomato puree
1 tbsp tomato ketchup
1 cup finely chopped tomatoes
1 tsp whole grain mustard
½ tsp pepper powder
1 tsp dried oregano
½ tsp red chilli flakes
Salt to taste


Method

The Dough
·         In a deep plate put together the first four ingredients of the dough
·         In bowl, take the luke warm water and mix the yeast, add a 1 tsp sugar and mix well. If the yeast is good, you will start seeing it activate (bubbles start to appear in the mixture)
·         Add the olive and yeast mixture to the other ingredients
·         Sift the ingredients together and make  a soft elastic dough
·         Make a ball of the dough and let it rest in a warm place till it doubles in size. This would take about 30-45 minutes (this is called proving)

 The Topping
·         Whilst the dough is proving we can prepare the topping.
·         In a pan heat olive oil and add the chopped tomatoes. Continue stirring occasionally till the tomatoes are cooked (have softened).
·         Add the all other topping ingredients and continue stirring over medium heat. Continue stirring till the liquid evaporates and you are left with a thick pasty mixture. This would take about 5 minutes.
·         Let it cool

Putting it all together
·         Preheat oven at 200F
·         Now take the dish in which would bake the bread. On the kitchen counter, spread a little dry flour, and flatten the dough in a round/ square shape (with your hand) ¾ of an inch thick (depending on the shape of your baking dish)
·         Transfer this to your baking dish. Ensure that the dough is about ½ cm away from the sides, this allows the space for the bread to expand during the baking process.
·         On this roughly spread the tomato paste leaving about ½ inch off the sides. Similar to the way you would spread pizza sauce on a pizza base
·         Bake in the oven for about 20 minutes till you can see the bread starting to brown from the sides.
 
Sprinkle some dried herbs and olive oil before serving


Post Script

I have added olives to this recipe. You could add capers as well.
This post is 3rd of the 3 posts documenting out the meal I put together yesterday for dinner. 


Chicken in Yogurt – Kotopoulo Giaourtava


Chicken in Yogurt – Kotopoulo Giaourtava

Until I got my hands on the “Phadion” guide to Greek Cooking – Vefa’s Kitchen, for me Greek Chicken meant Chicken Souvolaki. Turning the page after page, I discovered the variety of chicken preparations. This recipe caught my eye, and I had to try it out. An unusual combination of yogurt, egg and cheese caught my fancy. However, strange it may sound to some of us, the alchemy of simple ingredients, delivers one of the most mouth melting chicken dishes I have ever had!
 
This recipe is a modified version of the one in the book replacing some ingredients based on availability and taste. Greeks are known to use herbs and spices judiciously not like us Indians more the masala tastier the dish! Well, I did throw in some chilli flakes as I thought it needed that zing ..!
 

Ingredients
 
550g skinless boneless chicken breast/ thigh
2 tbsp extra virgin olive oil
1¼ cup strained or thick Greek yogurt (chakka dahi)
¼ cup processed cheese
¼ cup parmesan cheese
3 tbsp finely chopped mint
½ tsp pepper powder
Marinade
1 tsp garlic paste
1 tbsp extra virgin olive oil
1 tsp chilli flakes
1 tsp dried oregano
Salt to taste


Method

Marinating
Mix the ingredients of the marinade and the chicken. Let it marinate for about an hour.

Cooking the Chicken
·         In a pan take 2 tbsp extra virgin olive oil now add the onions. Sauté till they change colour to light brown.
·         Add the chicken and cook over medium heat stirring occasionally till it’s changed colour and you can see a few pieces start to turn very light brown. This will take about 5-6 minutes. Don’t over cook the chicken at this stage; it will tend to get rubbery.
·         Take off the fire, mix in processed cheese, parmesan cheese, mint, pepper and adjust salt. Don’t worry if the meat has left a little water.  Transfer to a baking dish.
·         Pre-heat oven to 200F
·         In a bowl break the eggs and mildly beat them. Now slowly whisk in the strained yogurt. Cover the chicken with this sauce.
·         Put the chicken to bake for about 15-20 min. Once done the chicken will have a light yellow custard glaze, like in the picture below. If you prefer you could leave it on a little more till it browns on the top.


Post Script
I keep experimenting with the recipes. I was determined I had to cook it yesterday with whatever I had in the fridge. The original recipe called for Gruyere Cheese –it’s a Swiss cheese used for baking. Still perplexed about with its inclusion in this recipe though! In the absence of this I just used the good old Amul processed cheese. Additionally the recipe called for way too much cheese I have reduced the quantity more than 70%. I can only imagine how heavy it would have been! Also I love garlic and chilli flakes, so added some to add the zing!

This post is 2nd of the 3 posts documenting out the meal I put together yesterday for dinner. 


Greek Marinated Vegetable Salad – Lahanika Marinata


I had been eyeing the Greek cooking bible, Vefa’s Kitchen for years, finally got my hands on it!

In her book Vefa details out the importance of vegetarianism in their cuisine. It is said the staples of Greece today are the same as they have been for centuries, cereals, beans, greens, herbs, the olive and its oil, figs, grape, wine and cheese. Greeks ate very little meat until the second half of the 20th century. For thousands of years meat was consumed only during feats and festivals in the honour of the many gods and goddesses of the Greek pantheon. In addition, the long history of fasting in the Greek orthodox religion which insisted upon abstention from animal products for almost a third of the year has resulted in a rich tradition of vegetable dishes cooked with olive oil. And believe me olive oil is never enough, the fresh taste of extra virgin olive oils especially in salads takes the flavours to another level.

I first tried Greek food during my days in hostel at Warwick - whatever my flatmate Aristae would put together. I was amazed to see how some of the cereals which we ate were staple food for her as well. When I started working in Delhi a quaint restaurant called “Its Greek to Me” in started in Delhi, which I would frequent, owing to light and delectable food, good cocktails and great music. Have fond memories of it. Unfortunately it shut down about a year ago.

This salad is apt for the summer season. This vibrant salad packed with freshness of mint and lemon is light on the stomach. An absolute delight!!!

This recipe is a slightly modified version of the one in the book.
 

Ingredients

1 red bell pepper cut into cubes
1 cup boiled carrots
1 cup French bean cut into small pieces
1 cup boiled cauliflower florets

Marinade
¼  tsp black pepper powder
½   tsp red chilli flakes powder
¼ cup mint leaves finely chopped
1 tbsp red wine vinegar
1 tsp honey
1 tbsp fresh lemon juice
3-4 cloves of garlic (crushed or finley chopped)
5 tbsp extra virgin olive oil
Salt to taste

p.s. even though I have used honey its only to balance the tartness of the vinegar – it’s not sweet at all, just a little note for all of you who steer away from sweet food!

 
Method

Marinade
·         In a mixing bowl add vinegar and lemon juice. Take a hand whisker, and whisk the mixture and slowly incorporate 3 table spoons of oil.
·         In a small pan, heat 2 tbsp of oil and add garlic. Once it has changed colour (ensure that its not brown), and turn off the fire. Now add the chilli flakes.
·         Incorporate the remaining ingredients into the marinade mixture – whisk well.

Now mix the vegetable into the marinade. Let them marinate in the refrigerator for about 3-4 hours. The traditional recipe calls for them to be marinated overnight. And the salad is ready to serve.


Post Script
Boiling vegetables – you don’t want to over boil vegetables. They become limp, lifeless and colourless. You want the salad to be crunchy yet not raw. I take a vessel, bring the water to boil. Add good amount of salt. This allows salt to permeate in the vegetables as well as helps retain the colour of the vegetables. Once the water has boiling, add the vegetable. It does not take more than 45 seconds to maximum a minute for hard vegetables. Take them out of the water immediately. Run them under cold water. If you leave them in water they continue to cook. Ensure you don’t cook all vegetables together. All vegetables have different times of cooking depending on the texture, and shape and size of the pieces.

You can add other vegetables as well – mushrooms, zucchini and broccoli. Please don’t boil the mushrooms and zucchini, just sauté them in a little bit of olive oil if you like them slightly cooked.

My next few posts are detail out the meal I put together yesterday for dinner. This is the first of the three posts.

Saturday 11 April 2015

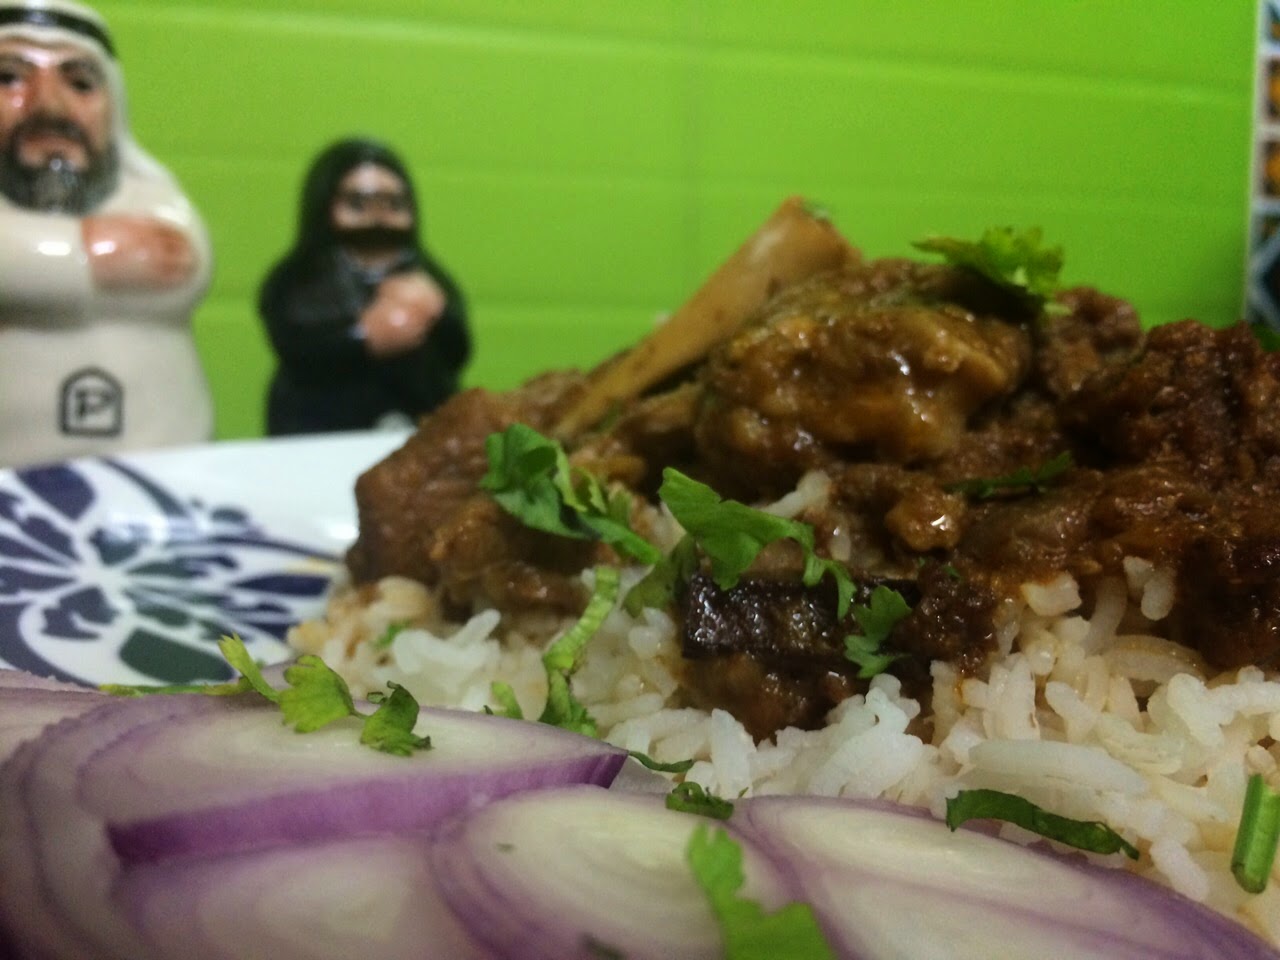
Maaz Yakkhn

I have always been very fond of Kashmiri food. It’s only recently that I have tried reading more about it and tried making it myself. One of my friend’s mom makes the best Kashmiri food, owing to her roots in Srinagar.  I hope she puts those mouth-watering dishes in a book someday. Kiran Aunty this post is dedicated to you.

They say history of Kashmir's traditional cuisine, Wazwaan, dates back to the last years of the 14th century when the Mongol ruler Timur invaded India in 1348 during the reign of Nasiruddin Muhammad of the Tughlaq dynasty. As a result, there took place a migration of trained weavers, woodcarvers, architects, calligraphers and cooks from Samarkand to the Kashmir valley. The descendants of these cooks came to be known as "Wazas", who are the master chefs of Kashmir. Waan in Kashmiri meas ‘shop’. A waazwaan is literally, a cook shop or a restaurant.

Maaz Yakkhn is meat flavoured with aniseed and dry ginger powder. These two ingredients together give the very unique flavour to the dish. The book I refer to is “Traditional Kashmiri Cusine – Wazwaan” written by the renowned Waza family – Published by Roli Press in India. This is not the traditional preparation technique but a quick rendition of the recipe.


Ingredients

350g boneless mutton pieces (lamb), from the leg
150g minced mutton (coarsely minced)
 

Khara Masala
5 green cardamoms
6-8 pieces of cloves
1 black cardamom
4 inch stick of cinnamon
 
3 medium finely sliced onions
2 tbsp vegetable oil
4 tbsp ghee
2 green chillies, split in half length wise
3 large cloves of garlic
1 tbsp ginger powder
¾  tbsp aniseed powder
1 cup yoghurt
1 cup water
1 tsp dried mint powder
¾ tbsp Kashmiri chilli powder (deghi mirch)
Finely chopped coriander for garnishing
Salt to taste


Method

·         In a pressure cooker, heat vegetable oil. Add the khara masala and let it crackle.
 
Crackling spices
 
·        Add the sliced onions and sauté it till it turns light to dark brown. Do this on a low flame to ensure you don’t burn the onions.
·         Add the meat pieces to the pan. Sauté pieces for about 5 minutes stirring continuously. Now add the minced meat and ghee and continue stirring it so it does not stick to the bottom of the pan. Ensure this is on a slow flame.  Continue to sauté for about 8-10 minutes, the meat will change colour.
 
The browned meat before adding yogurt
 
·         Once the meat has changed colour add the rest of the dry spices and yoghurt and stir for another 5 minutes. Do not add salt at this stage.
·         Add one cup of water add salt to taste and close the pressure cooker, keep it on a high flame. Once you hear the whistle let it cook for another 10 minutes on slow flame. Switch off the flame, open the cooker once the pressure subsides.
·         Transfer to a serving dish and garnish with fresh green coriander.  Serve with rice and onion rings.


 Postscript: Kashmiri cooking has the concept of using cooked yogurt. They do not use yogurt directly in the preparation. Yogurt is whisked with water and cooked, stirring constantly till it reduces to half its quantity and colour changes to off white.

Mediterranean Grilled Sandwich


Oh! I so love sandwich’s…a medley of flavours stuffed between two boring slices of bread. It’s all in the filling I say, the more fun and interesting your filling the tastier your meal would be.

I thank John Montagu for his laziness and his dedication to gambling for this modest invention! According the world’s most referred food bible “Larousse Gastronomique” – Sandwiches are named after John Montagu, 4th Earl of Sandwich, an inveterate gambler who acquired the habit of sending for cold meat between two slices of bread so that he would not have to leave the gambling table to eat. Although the name is relatively recent, dating from the beginning of the 19th century, the concept itself is ancient. It has long been a custom in Rural France, for eg. to give farm labourers working in the fields meat for their meal enclosed between two slices of bread. Also it was customary in south-western France to give those embarking on a journey slices of cooked meat sprinkled with their juices, between two slices of bread.

Every country has their own versions varying them with the filling or the bread. This one takes inspiration from the Mediterranean flavours – chargrilled peppers doused with olive oil, parmesan cheese and basil.


You could make a vegetarian version of this sandwich by replacing the chicken with pan grilled sliced Zucchini or aubergines add half a bell pepper more.  Details at the end of the recipe.


Ingredients

Basil Garlic Sauce Ingredients
2 cups basil leaves
½ cup extra virgin olive oil
4-5 cloves of garlic
Salt to taste
(This makes about 2 ½ cups of sauce which you can store in the fridge for future use)

Filling Ingredients
½ roasted red bell with preserving liquid, julienned
½ roasted yellow bell with preserving liquid, julienned
1 big tomato deseeded finely julienned
¼ cup sliced onions
4-5 slices chicken salami julienned
2 tbsp extra virgin olive oil
¼ -½ tsp red chilly flakes (as hot as you like!)
1-2 tbsp parmesan cheese (as strong as you like it)
2 tbsp basil garlic sauce (recipe below)
Salt to taste
(click here to see how to make roasted bell peppers)

Butter / Mayonnaise to smear on the
Grated Mozzarella Cheese
Big Sandwich Bread

 
Method
Step 1: Preparing basil garlic sauce

Put all the ingredients in a food processor and whizz it all together… voila! Keep the whizzing limited, enough to just put the ingredients together.  At any point in time you can always add nuts and parmesan cheese to this to convert this into the traditional pesto.


I usually have a bottle of this stored in my fridge. It lasts easily for about a month or two, as long as it is topped well with olive oil on top. Quite similar to when you make Indian pickles you have to ensure good amount of oil in order to preserve it. As basil is not always readily available in all stores in India, make this and stock it in the fridge and it can be used when making any sauce where you need basil and garlic. It gives the same flavour and using fresh basil. Dried and frozen basil don’t seem to give that flavour ever. Basil if exposed to air it tends to darken. You should ensure there is enough oil, top up a little if you feel it’s less. Once you store it in the fridge ingredients of the sauce settle a little and let the oil come up like a layer.

If you don’t want to make this sauce, you can also substitute this by ready-made pesto sauce available in gourmet stores or sometimes even your local grocer.  

(P.S. I will add pictures for this when I make it next, for this one I had the basil sauce kept in the fridge)
 
Step 2: Preparing the filling

·         In a pan heat some olive oil and add the sliced onions to caramelize them. Once they turn change colour take them off the fire.  
·         In a bowl add all the ingredients of the filling and the remaining olive oil and mix well. Adjust the salt.
·         This filling should be enough for 3 sandwiches (6 slices of jumbo bread)


 Step 3: The Final Step

·         Take 2 slices of the bread; put a light layer of butter or mayonnaise on both sides. Spread out a generous amount of filling. Top it with grated mozzarella cheese and cover it with the second slice
·         Put it in a preheated sandwich griller for about 5-6 minutes
·         Cut and serve  


Changes for the vegetarian version - Pan-grilling Vegetables:
 
Slice the vegetable, into thin slices. Brush with olive oil, sprinkle a little salt. Place on a pre-heated grilling pan. They should be ready in about 6-7 minutes. Don’t forget the turn sides during the grilling process. Don’t mix these in the filling. Place them on the filling just before putting the mozzarella cheese. In case you do not have a grill pan you could also use a simple non-stick pan.

About Me

My photo
I Juggle between being a finance professional by the day, a daughter, wife and new mommy in the balance of the hours. In between this whenever I get some time, I love spending it in my favourite place in the house - "My Kitchen". I love reading and collecting cooking books, watching food shows and trying out new recipes off stuff that I may have read or seen or got an inspiration from.