Sunday, 18 May 2014

Asian Pan-Fried Fish


This weekend Atul (my husband) got Mackerel and for the life of me I had never cooked a whole fish with bones before. My previous attempts have always been fillets which are easier to cook and there are loads of variations which I have experimented so that was my comfort zone. Now with 6 Mackerels on a plate I started wondering what to do, I knew grilling it or frying it was the best way out, so I started looking up recipes on the internet (my favourite place – BBC Good Food website) and then finally my library. I stumbled upon a book which I picked up in Bali – “The Food of Bali, Authentic Recipes from the Island of the Gods”. I finally settled for the Fish using the Balinese Spice Paste for Seafood. However, my larder was not my best friend today, and I was out of Lemon Grass and Macadamia Nuts and the recipe called for Shrimp Paste which I have never owned. So, with that recipe as my base I started improvising and came through this Balinese inspired Fish. The list of ingredients seems really long but is quite simple to make!


Ingredients

8 Whole Mackerels

The Marinade
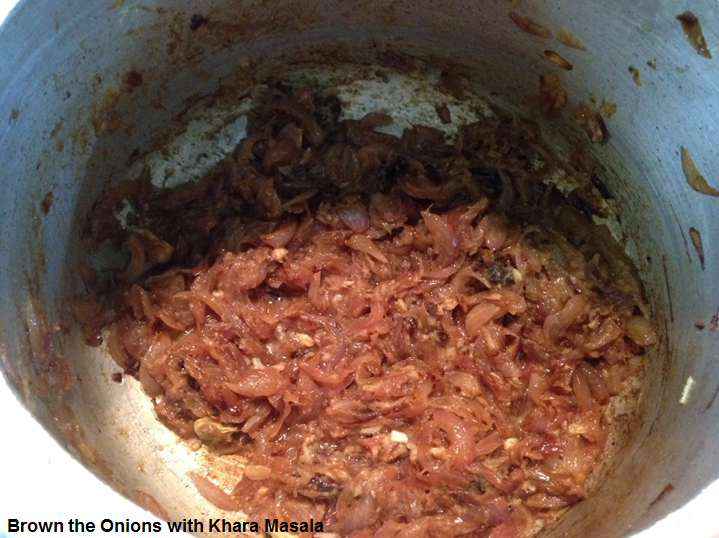
4 small onion sliced and sautéed light brown in colour
¼ cup roasted peanuts (I roasted them in regular vegetable oil in a pan)
1 tomato coarsely chopped
1 tablespoon of preserved red paprika (in case you don’t find this you could increase the red chilli powder or add a green chilli
1 tsp red chilli powder (can make it as hot as you like it)
¼ cup of coarsely chopped ginger
10 cloves of garlic
¾ cup fresh coriander
1 tbsp coriander powder
1½ tbsp. fish sauce (optional)
2 tbsp Light Soy Sauce
1 tbsp butter
1½ tbsp lemon juice
1 tbsp tamarind paste
4 tbsp extra virgin olive oil
Vegetable Oil for pan frying the fish
Salt to taste

Note: I have put out a recipe for 8 as the marinade that I prepared would serve 8-9 (9-10 inch fish)
 

Method


·         The thing with Mackerel is that it’s a very smelly fish, so my first task was to get reduce the smell. I used a mix of vinegar (4 tbsp), turmeric powder (1 tbsp) and salt (2 tsp) and let the fish marinate in it for about two hours before I washed off the marinade and pat dried the fish with a kitchen towel.  


·         Begin with preparing the second marinade - grind all the ingredients in the processor. Check the mixture for salt and chillies and add more if required.


·         Coat the fish generously with the marinade and leave it for 1 hour. Don’t forget to pop a little inside the fish cavity.


·         Heat about 4 table spoons of oil in a large non-stick pan. Once the oil starts to smoke put the fish into the pan. I wouldn’t put more than 2 in a go, as you need place to turn the fish as well. Ensure that the fish is well coated with the marinade before you put it in the pan


·         Cook the fish on each side for about 4 minutes. If you feel the heat is too high, switch between a medium to high flame. When turning, use a flat fish turner, to ensure that the fish doesn’t break and the marinade sticks to the skin. (In the picture below I managed to scrape a little bit off one of the pieces..that's what you have to avoid !)


·         Carefully transfer to a serving dish. Take some of the marinade mixed with the oil from the pan and pour over the fish. Serve it alone, or with steamed rice.


Tuesday, 13 May 2014

Asian Noodle Salad


This is a very light and filling salad recipe. I love making it when I’m in mood to eat a cold noodle dish in summers. It’s been a great hit with my friends. I love the fresh flavours bursting from mix of lemon juice, coriander and garlic accentuated by the nuttiness of the sesame oil.
 

Recently we started a little kitchen garden on our terrace. Coriander, being the fastest to grow, is the first 'fruit' of the effort and believe me organic home grown coriander gives a far more aromatic flavour than the one from the market.


I will keep you posted on the latest harvest of our little garden...in the mean while enjoy this super addictive salad.


Ingredients
2 cups cooked egg noodles (just follow boiling instructions on the pack)
¾ cup boiled julienned carrots
¾ cup julienned green pepper
1 tomato, finely sliced (without seeds)
½ cup mung bean sprouts (the long variety)
½ cup julienned cucumber
¼ cup finely chopped fresh coriander

Dressing
1 tsbp soy sauce
 tbsp good quality sesame seed oil
1 tbsp fresh lemon juice
1 tbsp white malt vinegar
2 tbsp sweet chilli plum sauce
1 tbsp red chilli sauce
2 large cloves of garlic
1 tsp red chilli flakes ( as hot as you like it) you could also mix and match with green chillies
Salt to taste

Tip: When boiling noodles always ensure to add a good amount of salt in the water and always add noodles to boiling water. When cooked always wash under cold water after draining
 

Method

Take a small bowl and whisk together all ingredients of the In a mixing bowl put all the ingredients add the dressing. In a salad bowl put all the remaining ingredients of the salad, add the dressing and toss well. Keep in the refrigerator for an hour for the salad to chill and dressing to be absorbed.

One can experiment with a lot of variations in this salad, from adding crushed peanuts to add to the nuttiness of the sesame oil. You could also add finely sliced ginger to the dressing, it add the extra tang to the salad. Add cooked prawns or boiled and shredded chicken; however, insure to increase the quantity of the dressing!


Sunday, 11 May 2014

Potato and Apple Salad


“An apple a day keeps the doctor away” – my mum tried her best to lure me with this one, but for some reason I never took to munching away apples. I have always been one of those kids who stayed away from any fruit which was high on nutritional value! I’m sure I gave my mother quite a time, and completely understand her pain now when I have become a mother myself.  In my mother’s recent effort to feed me apple (when I was pregnant, and was one of the must haves on the food list) she made a lovely, refreshing potato apple salad which I could have as a meal by itself any time. So today being mother’s day, I dedicate this post to my mum – love you lots Mumma !  
 
Hope you enjoy this salad just as much as I do.
 

Ingredients
 
1 large apple cut into cubes
2 cup baby potatoes peeled
1½ cup boiled carrots and French bean cut into small pieces (you could also add peas)
½ cup finely chopped gherkins

Dressing
5 tbsp hung yoghurt
4 tbsp Mayonnaise
¼  tsp black pepper powder
½ tsp Tabasco Sauce (classic red)
1 tbsp dried chives
2 large cloves of garlic
Salt to taste

Method

In a mixing bowl put all the ingredients of the dressing and mix well. Add the potato, apple, vegetables and gherkins and mix. Keep in the refrigerator for an hour for the salad to chill and dressing to be absorbed.

Another good variation of this is to replace the chives with ¼ cup finely chopped fresh dill leaves (Soa ka Saag).


Friday, 9 May 2014

Pressure Chicken Biryani


Now days, Biryani is commonly cooked in most parts of India. And each state has its own version be it meat or vegetarian. The traditional Biryani hails from Awadh, and is cooked using the famous “Dum” technique which requires the dish to be cooked on a slow flame in a sealed container. The end product is fabulous but is a laborious process!

I started cooking Biryani when I was studying in UK and used to crave for good Indian food, which in the Midlands was only a dream. It was then I was introduced to Biryani masala’s made by Shaan which were commonly available in Indian stores. With a bit of practice, reading some recipes and a bit of hit and trial, I managed to understand the proportions and produce a decent tasting meal.

 It’s amazing how many version of Biryani are cooked across India. A few years ago, I came across a lovely book on Biryani’s written by an ex-IAS officer Pratibha Karan. This is a must read for anyone who is fond of Biryani and is keen to explore various versions of it served across India. She covers about a 100 in this one!

My household is full of biryani fans and that’s something we manage cooking very often. Since this task is usually entrusted with me, I thought of making it a little easier and shorter by not marinating the meat and relying on my good old pressure cooker to add the “Dum”. Additionally, I chose to add a combination of Chicken pieces and mince, as it just gives a great flavour and you don’t go hunting for that piece in every bite. So here goes my version of a shortcut chicken biryani.

Ingredients

250g Chicken Breasts cut into small pieces
150g Minced Chicken
350g Basmati Rice

Khara Masala
2 green cardamoms
3 black cardamoms
10 pieces of cloves
3 inch stick of cinnamon
5-6 Black Pepper Corns
1 Bay Leaf

4 large onions finely sliced
5-6 tbsp vegetable cooking oil (you could replace this with ghee as well if you prefer)
2 tbsp ghee
1½ tsp garam masala
1 ½ tbsp ginger paste
2 tbsp garlic paste
¾ cup yoghurt
2 tbsp dhania/coriander powder
½ tsp pudina/mint powder
2 tsp deghi lal mirch / red chilli powder
A hand full of chopped fresh coriander
Salt to taste (I used about 3 tsp in this recipe)


Method
 
·         In a large pressure cooker (I used the 5 ltr one), pour 5-6 tbsp of vegetable oil and heat it. Add the khara masala and let it crackle. Add the sliced onions and sauté it till it turns light to dark brown. Do this on a low flame to ensure you don’t burn the onions.


·         Add the ginger and garlic to the onions and sauté for 1 minute

·         Add chicken to the pressure cooker and the ghee and cook for 5 minutes. Add the yoghurt ,dhania powder, garam masala and red chilli powder and mix. Further, continue to stir and toss the chicken till the gravy starts changing colour -turning brown and has reduced to half (this could be another 15-20 min).


·         Once the chicken has cooked, add the washed rice to the chicken and stir well. Add enough water to just about cover the rice and chicken mixture (this would be about 450-500 ml). Add pudina powder and fresh coriander and bring the mixture to a boil. It’s tricky getting the water right, but trust me this should work!


·         Cover the pressure cooker and cook on a medium flame till you hear 4 whistles. Immediately shut the fire but do not open the pressure cooker till all the steam has naturally escaped. Note, the rice continues to cook even when the fire is off with the steam in the pressure cooker.  
 
·         Accompaniment : Garlic Yoghurt - To 1 cup of yoghurt add 2 big cloves of finely minced garlic, ½ tsp black salt, ½ tsp    cumin powder and whisk.
Serve with garlic yoghurt and onion rings.


Sunday, 4 May 2014

Mock Chicken Korma


This chicken dish is inspired from the famous chicken korma. However, one can debate the term korma has various interpretations from the thick white gravy to a brown gravy or be it vegetable or meat. The usual meat korma recipe require cashews/ almonds, double frying onions and sometimes even coconut. In my effort to make it a tad easier and lighter (though we all could debate this with the amount of fat that goes in!) I decided to leave out the almonds and the tedious process of double frying the onions and surely the coconut (which I run miles away from!). So here goes my version of a yummy chicken recipe - I hope you enjoy it as much as everyone in my house does.
 

Ingredients

10 chicken drumsticks

Khara Masala
8 green cardamoms
2 black cardamoms
10 pieces of cloves
4 inch stick of cinnamon

2 ½ cups finely sliced onions
5-6 tbsp vegetable cooking oil (you could replace this with ghee as well if you prefer)
2 tbsp ghee
½ tsp garam masala
2 green chilies, split in half length wise
1 tbsp ginger julienned finely1 tbsp kewra (screw pine water)

Finely chopped coriander for garnishing
Salt to taste

 Marinade
1 ½ tbsp ginger paste
2 tbsp garlic paste
¾ cup yoghurt
1 tsp garam masala
3 tbsp dhania powder
2 tsp deghi lal mirch
2 tsp salt


Method

Wash the chicken well and pat dry. Make to slashes with a knife on each leg, this helps the marinade seep in better. In a bowl marinate the chicken legs in the marinade above for an hour


In a heavy bottomed pan, pour 5-6 tbsp of vegetable oil and heat it. Add the khara masala and let it crackle. Add the sliced onions and sauté it till it turns light to dark brown. Do this on a low flame to ensure you don’t burn the onions.


Add the marinated chicken legs to the pan. Do not add the excess marinade as yet. Once the chicken has cooked a bit for about 4-5 minutes add the marinade, green chillies and ghee and continue to stir on a low flame. Cover the vessel and cook for 10 min till the sauce starts to bubble. Continue to stir and toss the chicken till the gravy starts changing colour -turning brown and has reduced to half (this could be another 15-20 min). You will notice that the masala starts leaving oil as well.

 
Once the chicken has cooked, sprinkle in the remaining garam masala, add kewra and adjust the salt. Transfer to a serving dish and garnish with fresh green coriander.  
 
Serve with any Indian bread (roti, paratha or naan) and onion rings.


Yoghurt Dips


These are my all-time favorites and something absolutely easy to rustle up – yoghurt dips. An easy find in almost every Indian Kitchen is yoghurt; it is the perfect base for a scrumptious dip. You could have it with chips, potato wedges, crudities grilled chicken or even use them as a sandwich spreads. 
The secret to a good dip is in the consistency and in case of yogurt dips means having thick creamy yogurt. The moment I hear a whisper in the house that we are having guest over I run to the kitchen and pour a box yogurt into a muslin cloth and hang it for about  two hours (depending on how much water the yogurt has) to drain the water and voila.. creamy hung yogurt or Greek yogurt (also called chakka dahi in Hindi).

The best thing about these yoghurt dips is, once you get a hang of the basics you can experiment as much as you like and have a new creation every time. Its best to prepare these and leave them in the fridge for an hour before serving as it allows the ingredients to mix well and enhances the flavor.


Garlic Chilli Dip

1 cup hung yoghurt
5 small garlic cloves crushed coarsely in a mortar and pestle (add on more if you’re fond of garlic)
2 tsp of dried chives
1-1 ½ tsp of red chilli flakes (depending on how hot you like it)
A few drops of red Tabasco sauce
Salt to taste
1 ½ tablespoon of extra virgin olive oil

In a pan heat olive oil for about 30 seconds on a high flame. Add the garlic and stir it around till it turns light brown in colour. Add chill flakes and take it off the flame.  Pour this into the yogurt and mix well. Add tabasco, chives and salt to taste and mix. Leave some chives to sprinkle on the top. As a variation I sometimes omit the chives and add another clove of garlic.
 

Yoghurt and Roasted Red Pepper Dip

¾  cup hung yoghurt
¼  cup mascarpone cheese
5-6 drops of Tabasco sauce (red)
3 small garlic cloves crushed coarsely in a mortar and pestle
4 tablespoon of coarsely ground roasted red bell peppers
 ½ tsp of red chilli flakes (or more depending on how hot you like it)
1½ tbsp extra virgin olive oil
Salt to taste

In a pan heat olive oil for about 30 seconds on a high flame. Add the garlic and stir it around till it turns light brown in colour. Add chill flakes and take off the flame.  Put the rest of the ingredients in a bowl and add the garlic, chilli and oil mixture. Stir well. Add salt to taste.

For the recipe of roasted red peppers see the following post Click Here or adopt the easier way, buy the preserved roasted peppers from any gourmet store.


Cheesy Yoghurt Dip

1 cup hung yoghurt
4 tbsp grated processed cheese (add more if you like)
2 tbsp finely chopped onions

6-7 drops of Tabasco sauce (red)
1 tsp whole grain mustard
1½  tbsp finely chopped gherkins
 tbsp finely chopped black olives
a pinch of dried oregano
½ tsp red chilli flakes
1½ tbsp extra virgin olive oil
Salt to taste

To prepare the seasoned oil mixture, heat olive oil for about 30 seconds on a high flame. Add the onions and stir it around till it turns light brown in colour. Add chill flakes and take off the flame.  In a bowl mix rest of the ingredients, pour in the seasoned oil mixture and mix well. Remember, preserved gherkins and olives can be salty.
 
Note: if you love the flavor of extra virgin olive oil you could surely add more, just remember it will impact the consistency of the dip


Friday, 2 May 2014

My first post - Brown Rice and Chicken Salad


It’s been ages since I have been contemplating on writing a blog about what I enjoy doing the most and share my passion for cooking with others around! Any time of the day even when I’m dead tired, something scrumptious just makes my day.  I love collecting cookbooks and am one of those crazy people who reads cookbooks even at bed time!  So finally putting my procrastination abilities at rest here goes my first post!
I decided to start off with a light but filling summer salad which I had for dinner today!

Brown Rice and Chicken Salad

Ingredients
  • 2 cups cooked brown rice
  • 4 tbsp chopped roasted red bell with preserving liquid
  • 4 tbsp diced tomatoes
  • ¼ cup sliced onions
  • ¾ cup shredded left over roast chicken
  • 2 tbsp extra virgin olive oil
  • 1 cup boiled carrots and broccoli (al-a-dente) diced
  • ¼ -½ tsp red chilli flakes (as hot as you like!)
  • ½ tsp Zatar Powder* (available in gourmet stores
  • Salt to taste


*Zatar Powder: Its a middle-eastern herb mixture of thyme, oregano, marjoram, toasted sesame seeds, salt and sumac. It’s used to flavor meats and vegetables and as dip for pita bread when mixed with olive oil. It’s easily available in gourmet stores. I use the mix under the brand name Naturesmith.

 Method

Step 1: Preparing the Roast Peppers
Well the easier option is buying them off the shelf in a gourmet store ! But I recently tried making them at home and believe me it tastes better.

Cut a bell pepper (red / yellow) into 4 pieces length wise. Now with a tong, let it char on a direct flame for a few minutes turning it once or twice. Transfer the charred pieces into a zip-lock bag to cool. This will make it sweat and loosen the skin. Remove the charred skin. Put the peeled peppers in a box (along with the liquid which it would have left in the zip-lock bag)and pour a bit of extra virgin olive oil . This can be preserved in the fridge for about a week.


Step 2: Caramelizing the Onions with red chilli flakes
Take a small pan, heat 2 tbsp of extra virgin olive oil and add the sliced onions. Once they are light brown add the red chilli flakes and stir for another 10-15 seconds. Remember to retain the flavoured oil in which the onions were browned, it acts as the salad dressing along with the liquid of the roasted peppers.

Step 3 – Toss it up
Put all ingredients in a bowl, mix together. Plate it and enjoy your meal.


About Me

My photo
I Juggle between being a finance professional by the day, a daughter, wife and new mommy in the balance of the hours. In between this whenever I get some time, I love spending it in my favourite place in the house - "My Kitchen". I love reading and collecting cooking books, watching food shows and trying out new recipes off stuff that I may have read or seen or got an inspiration from.